Set Custom Options for Customer Groups
1. Log into the website's administration panel.
2. Go to "KC:Web Settings" on the left-hand menu.

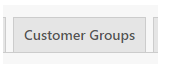
3. Go to the "Customer Groups" tab.
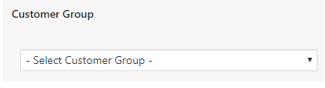
4. Select the Customer Group you want to add the option to.
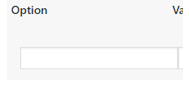
5. Enter a name for the option into the "Option" field. This should not have spaces it in and should preferably be in camel-case.
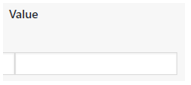
6. Enter the value for the option into the "Value" field.
7. Click "Save Changes" to save the new message.
Adding / Removing Config Options
You can add new message lines by clicking the "Add Config Option" button, this will add a new line where you can enter a new option against the Customer Group:

Adding / Removing Customer Groups
You can add new customer group lines by clicking the "Add Customer Group" button, this will add a new line where you can select the Customer Group and add options against it:

Example: Setting a Minimum Order for Trade Customers
As an example of how to set a custom option, we will set a minimum order total for Trade customers.
To do this we will setup a new config option called "min_order" and set it to the value we want Trade customers to exceed when they place an order, as follows:

This setup will force any customer that has a Company Class of "Trade" to exceed £1200 worth of items when they place an order.
This is one of the in-build config options, and will work out of the box, but others will likely need implementing within your website in order to take effect.
If you would like a new config option implementing, get in touch with the Khaos Control Web team.
Related Articles
Content Groups
Accessing Content Groups You can access the Content Groups by going to "Static Content" -> "Content Groups" on the left-hand menu. Adding a New Content Group To add a new Content Group, fill in the form on the left-hand side of the page. Give the ...Static Content User Interface
Static Content title Enter the title for the Static Content. This title will be used by Wordpress to generate the URL for the Static Content. Permalink The Permalink is the URL for the Static Content. You can change the end section of the URL by ...Main Settings
Accessing the Main KC:Web Settings You can access the main KC:Web Settings by going to "KC:Web Settings" -> "Available Options" on the left-hand menu. Available Options General Custom URL Routing: Enter custom URL routing. These routings allow ...Set a different Payment Type for a Company Class
If your website uses either the Stripe or Opayo PSP integrations then you can set a different Payment Type from the main one for specific Company Classes. 1. Log into the CMS of your website. 2. Go to “KC:Web” -> “Available Options” on the left-hand ...Title and Metas
Accessing Title and Metas You can access the Titles and Metas settings page by going to "SEO" -> "Title and Metas" on the left-hand menu. Available Options General Force rewrite titles: Set whether the "Yoast SEO" plugin should force rewrite titles ...